My Blue Jay Getaway

My Blue Jay Getaway

NannieTop2sm4

 I’m finally back from the Hollow (pronounced holler) after a week away with my family. When I say “away,” that’s exactly what I mean — very little cell service, a land line that doesn’t dial out, no Internet and only three channels on the TV. But of course, who needs all those things when you have dozens of aunts, uncles, cousins. . . and you can drive 20 minutes to town to “borrow” WiFi from Daylight Donuts or Mustang Sally’s.

I didn’t do much “borrowing” during the week, because we managed to fill our days (and nights) with shopping, playing, swimming, visiting, Scrabbling and of course eating. I took my running shoes on the trip, but only managed to squeeze in one run while I was there. I quickly gave up on fitness and decided to see how many tasty things I could stuff into my belly in five days flat.

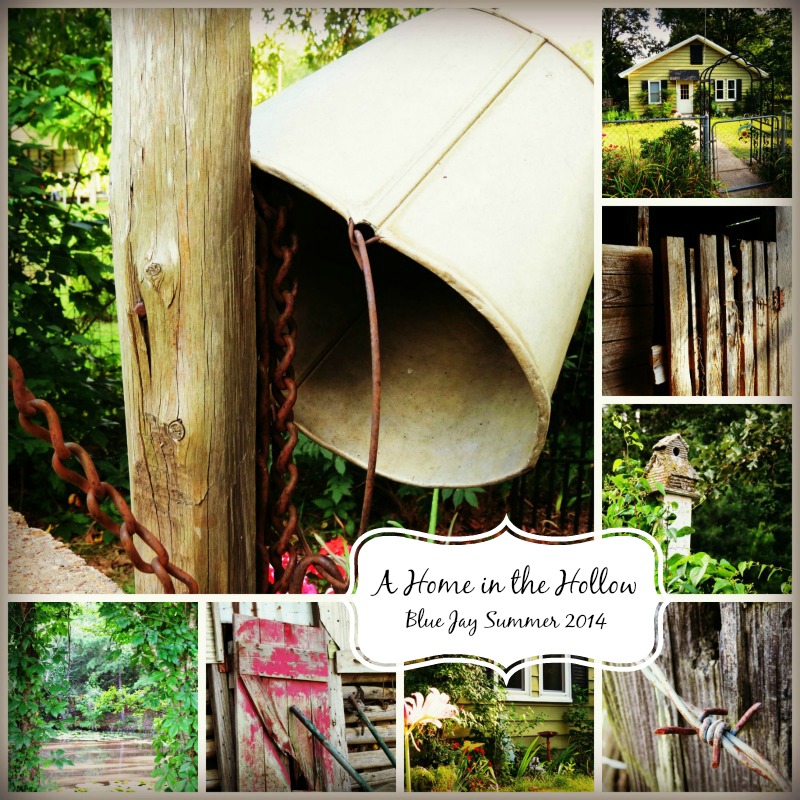
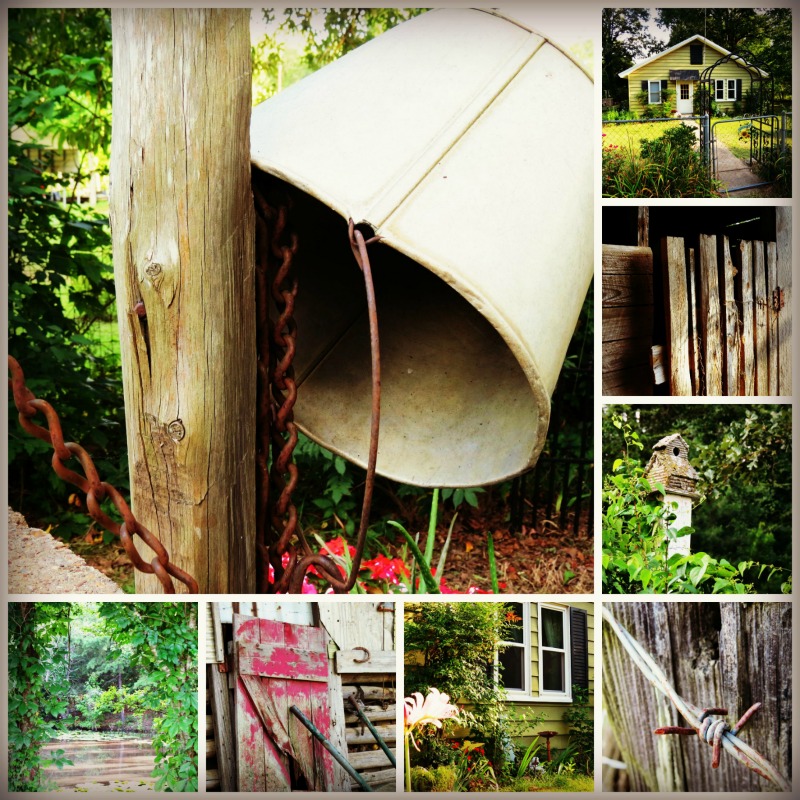
I could fill your ears with so many wonderful stories of my vacay in Blue Jay Hollow this year; but instead I decided to fill your eyes with sights of the quaint place that is simply called by most of us, “Nannie’s.” After my grandmother, Nannie, passed away, my Mom bought the place and it is still where we all gather for Thanksgivings, Easters, weekend retreats and summer vacations. It may be small on space but it’s big on love and wonderful memories.

NanniesCollage2sm

Off the Shelf — Live Inspired Book 2

Off the Shelf — Live Inspired Book 2

I received a complimentary copy of this book in exchange for my honest and personal opinions.

LiveInspired2I’m finally getting the chance to pass along my thoughts and opinions of Live Inspired Book 2 as a member of the Beacon Hill Press Off the Shelf Bloggers. I’m really excited to be a part of this group of book reviewers and hope that you find this critique helpful for your future book selections. I haven’t read Book 1 of this series, so I won’t be comparing the two, but I did evaluate Book 2 on it’s own merit and content.
Live Inspired Book 2 is a 90-day devotional for students that teaches Biblical life lessons through a variety of activities, prompts, discussions and challenges. The book was designed to be an interactive journal for teens and the opening remarks encourage students to think and “draw outside the lines.” Live Inspired is more than just a topical study for teenagers, it’s a catalyst for putting faith in motion. It outlines topics related to student life and connects the teaching with introspective activities and specific challenges to promote an active Christian life. The book encourages learners to think outside the box, explore new ideas and look at Biblical principles in a new way.

Readers are empowered in many different ways to choose and use specific activities, such as the “Pick Two and Do” pages and various other activities that include writing, listening to music, drawing, painting and origami. In addition, there are a lot of prompts for personal reflection and prayer time, but there are also “Conversation Circle” activities throughout the book where students are encouraged to discuss specific ideas and opinions in small groups.

While I thought the lessons were Biblically sound and many of the activities to be intriguing for a variety of different types of learners, I was a bit perplexed by the basic composition of the book. For example, some activities require the learner to tear out pages and create something with them, but the next lesson is on the other side of that page. Maybe it’s just the former teacher in me, but how are students suppose to take part in the next lesson if that page is now a soggy origami cup sitting in the bottom of a trashcan?

In my opinion, the lessons and activities in Live Inspired Book 2 seem to be appropriately geared toward the suggested audience, but the basic design of the book is not conducive to teaching and absorbing all of the lessons being offered. invariably some lessons will have to be skipped or read out of order to get everything this book has to offer.

Welcoming Rosette for Independence Day

Welcoming Rosette for Independence Day


Independence Day Rosette

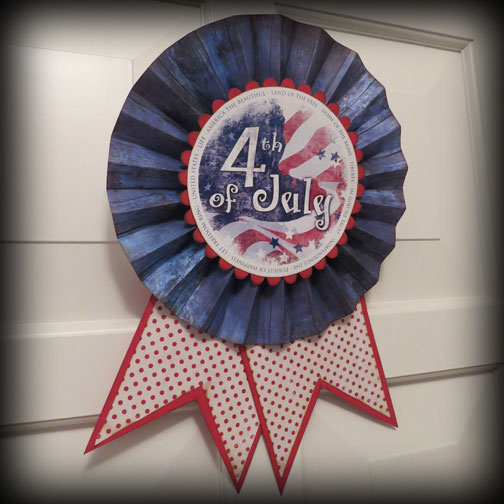
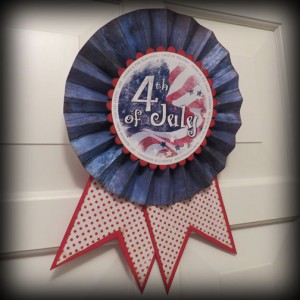
Today I’m showing you the newest addition to my patriotic home decor, complete with easy instructions and printable.  This door-sized rosette was easy to make and you should be able to whip up your own in about half an hour or so — just in time for Independence Day.

Materials:

  • Three pieces of red cardstock – 8 1/2 x 11″
  • Two pieces of decorative blue paper – 12 x 12″
  • One piece of coordinating decorative paper – 12 x 12″
  • Paper adhesive
  • Small piece of twine (for hanging)
  • Craft Glue
  • July4Rosette printable (pdf)
  • Dark brown ink pad

july4rose2july4rose3

Instructions:

  1. First, let’s make the large blue rosette portion of the project by cutting the two pieces of blue paper in half so that we end up with four pieces of 12 x 6″ strips.
  2. Ink the outside edge of each piece with the dark brown ink pad. Score each of these pieces at every inch and according fold.
  3. Using adhesive, connect all these pieces together. Keeping the paper flat, fan out the pieces in a circle and adhere the two ends together to create the rosette. To keep this crazy thing flat while you work, you can place a light-weight book or magazine on top of the newly formed rosette.
  4. Next, we’ll make the center of the rosette by cutting one piece of red cardstock into a circle approximately 8″ in diameter. I used my Cricut to cut the scalloped edge, but you can use whatever you have — cutting machine,  decorative scissors or circle cutter.
  5. Ink the edges of the circle and glue to the center of the rosette using paper adhesive or glue.
  6. Print out the July4Rosette rosette center and cut into a circle, about an eight of an inch away from the outside words. Ink the edge all the way around and adhere to the red circle.
  7. To create the tails to the rosette, cut the two remaining sheets of read cardstock down to 6 x 11″ and then cut a triangle out of each piece to form the banner shape. Ink the edges.
  8. Cut the coordinating sheet of decorative paper to create two pieces that are a half inch smaller than the cardstock tails and cut a coordinating triangle in each piece. Ink all the edges and adhere to the cardstock tails.
  9. Adhere the completed tails to the back of the rosette at whatever angle you like.
  10. After everything is assembled, cut a short piece of twine and tie a loop for hanging. Flip over the rosette, add a dab of glue and adhere the twine loop.
  11. When the glue dries, hang your welcoming rosette for all your guests to see.


Page 125 of 157
1 123 124 125 126 127 157