Blue Ribbon Pickles

Blue Ribbon Pickles

blue ribbon

blue ribbon pickles
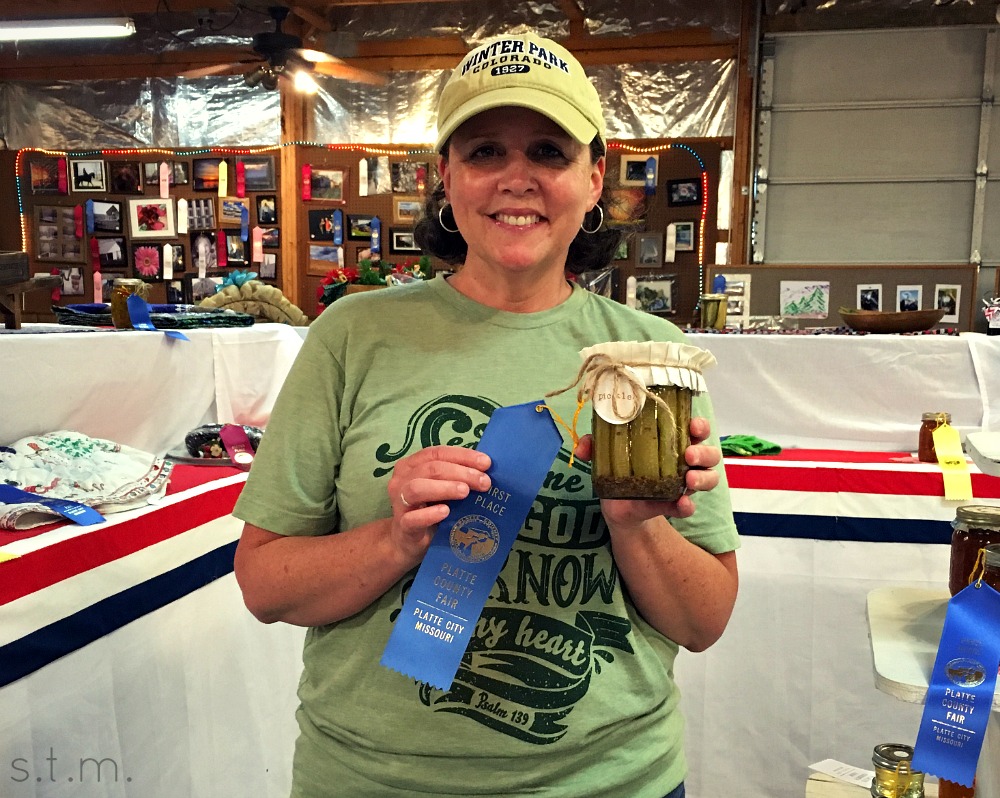
This summer has been super busy, but somehow I did find a few minutes to enter some items in our local Platte County Fair (the longest continuously running county fair west of the Mississippi River, mind you) and this year I came home with two blue ribbons. I was so excited!

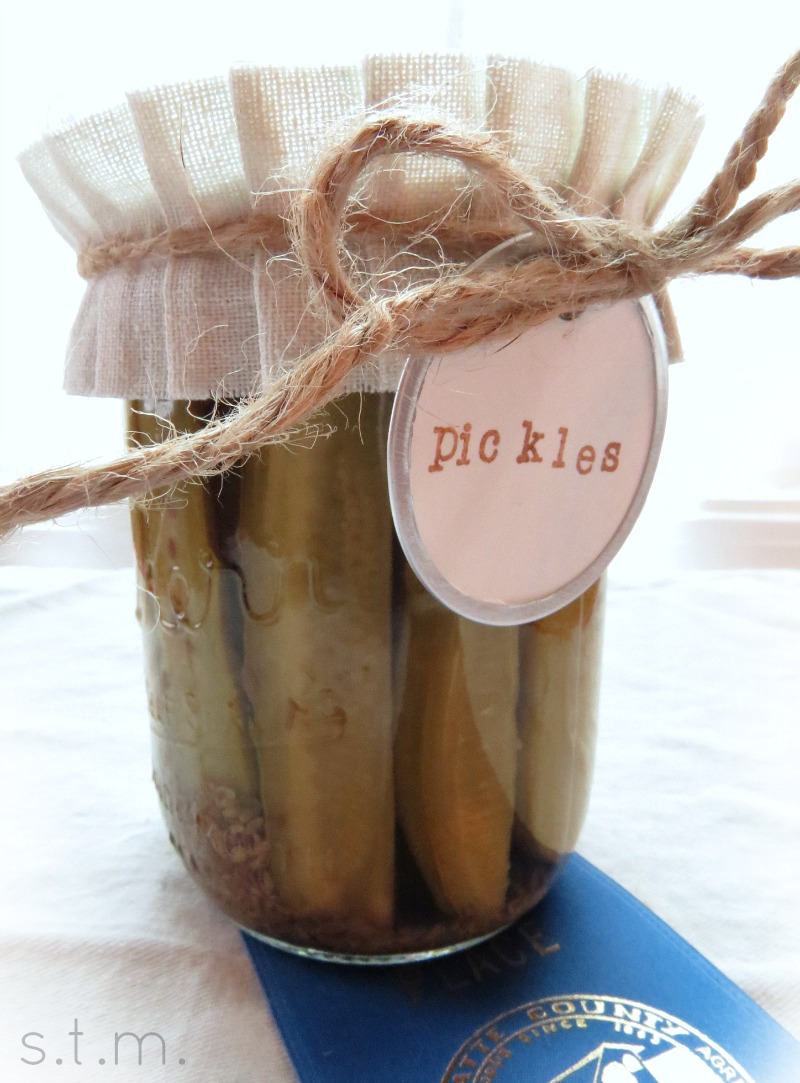
I entered a jar of dill pickle spears, yup that’s them with their blue ribbon right there, but I was hoping to enter a jar of our yummy hamburger dills also. Unfortunately, when I went to grab a jar I discovered my husband had eaten every last one. Yes, my husband ate my fair entry, but he did apologize and added, “If it’s any consolation, you should have won a blue ribbon. They were delicious.” Okay, so I don’t have a shiny new ribbon to show for it, but I’ll take that vote of approval.

If you want to give your own husband-pleasing pickles a go, you should try the hamburger dill canning recipe here at Small Talk Mama.

I also entered three photos in the fair, one of which brought home a blue. This photo of a female cardinal braving a winter storm is one of my favorites from our back porch. I’m so glad the judges liked it too.

MamaCardinal2

There are so many reasons I love to participate in the county fair, but one of my fondest is that I think my Nannie would be so proud. My grandmother, we called her Nannie, entered her own county fair each year and earned oodles of ribbons throughout her life. Before she passed I consistently ogled her latest blue ribbon projects each fall; so when my husband and I moved to a county that hosted its own fair, I decided to carry on the tradition. My first thought in the exhibit hall this year was that I hoped I made my Nannie proud.

The Bats are Back

The Bats are Back

bat

When we first moved into our home four years ago we used to spy a few bats feasting in our backyard on a fairly regular basis, but somewhere along the way they seemed to move on to better living spaces or tastier places. This made me sad long before the rise of the Zika virus and the new suburban bat lovers who are suddenly embracing these mosquito-eating machines.

So imagine my delight this week when I stepped out onto the deck and spied two bats speeding back and forth across our backyard with seemingly ravenous appetites. Maybe it was just coincidence, but this mosquito-magnet of a girl didn’t get a single bug bite while the bats were around, and of course my son thought the whole show was pretty awesome.

My thoughts immediately went to ways to keep these little flying bug eaters coming back, so I did some research and found a few ideas to help roll out the welcome mat if it’s bats you embrace.

First, let me say that I found several ways to increase the bug population in one’s yard thereby attracting more bats, but our home backs up to a lot of timbered acreage — we have bugs, and I don’t want more. At first this approach seemed counter-productive (I want bats so that I don’t have bugs) but after some thought I realized that bats don’t just eat the pesky biting bugs, they also eat tons of insects that have no urge to suck human blood. Would you go to a restaurant with only one thing on the menu?

So going full-circle, here’s what I found for encouraging and keeping beneficial bats coming back. . .

Embrace bugs! Chances are you already have bugs (i.e. pesky disease-carrying mosquitoes), so what’s a few more. Lure a variety of night-flying insects to your yard by having a water source, planting flowers that smell good at night and adding an outdoor light or two.

Skip the chemicals. Avoid pesticides, insecticides and other harmful chemicals in your yard that can make bats sick if ingested.

Make it Homey. Some species of bats will roost in dead or dying trees, but most of us don’t want to keep potentially hazardous huge items on our property for a variety of reasons, so making bat houses is another option. If you do a search online, you will find dozens of DIY options that should suit you and your future winged creatures just fine. While I can’t vouch for the best style or even say they work, this project is high on my To-Do list. You should also pay special attention to the best places to hang your bat houses after they are made.

So if you like the idea of bringing life to your night sky, these suggestions are a good place to start. While there’s no guarantee the little winged mammals will want to call your neighborhood “home,” try supplying them with lots of food, a little water and a cozy place to hang their tiny bat hats.

 photo credit: Malaysian Flying Fox at Singapore Zoo via photopin (license)

Trash Bag Jellyfish

Trash Bag Jellyfish

trash bag jellyfish

In a quest to create something cheap and easy for this year’s “Submerged” Vacation Bible School theme,  I found this wonderful trash bag jellyfish project on, where else, Pinterest. These cute little sea creatures have been taking over my home for a week now and I simply love their ethereal presence all around our decorated church. Along the way I discovered that these fun little sea creatures have been assembled in many different ways by several different folks, but I wanted to share with you exactly what worked for me.

trash bag jellyfish

Start with two trash bags. I used opaque ones, translucent ones, pink ones and blue ones. Any old bags will do, but I think my favorites were the cheap pink ones I found at the dollar tree. They have a light and airy feel and the color is perfect for jellyfish, but this is VBS and we can imagine jellies in any color we choose.

Before I started making my jellyfish, I created a few hangers for the little guys by cutting up some fishing line (length depends on personal preference and hanging location), tying it in a loop and attaching a paperclip. I made several of these hangers ahead of time, because this is the boring and kind of time-consuming part of the project.

To make the top of the jellyfish,  I used one bag, one rubber band and one paper clip hanger. Fluff a bag in the air to completely open it up and then gather the open edge of the trash bag in your hand as if you were making a air-filled bag to pop; although you don’t want to fill it completely or the next step won’t work.

With the gathered bag in one hand, push the natural bottom of the bag down into the middle and into the gathered hand. Some trash bags have a straight seam, which means you will also have to tuck the two corners down into that gathered hand as well or your jellyfish will end up with ears. . . and as far as I know jellies don’t have ears. 

Now take a premade hanger and push the paperclip down through the middle and into the gathered hand. You should be able to feel the paperclip in your hand, but the fishing line should be sticking out the top. Secure everything in your gathered hand with a rubber band, making sure the paperclip is anchored in place below the rubber band. You should end up with an air-filled bagel-shaped bag with fishing line out the top.

trash bag jellyfish

Now onto the tentacles. To make long, flowing tentacles you need to start with your second trash bag. Cut off all the seams and corners, but keep the two layers together. Using a pair of scissors, cut a spiral shape from the outside in. You can cut this as thin or thick as you like, but I think the skinny version isn’t quite as pretty. After you cut the spiral, pull apart the layers and let them hang. The spiral cut is essential to the long flowing look, so don’t cut corners — I tried it.

trash bag jellyfish

Cut the tentacles to desired length and push one end through one of the rubber band loops already in place on the jellyfish body. If you want to add more layers, simply cut another trash bag or add some other types of materials to achieve a fuller look. I used everything from tulle, ribbon and unraveled cheap plastic leis from the dollar store.

One of my favorite things about this project is that all my trash bag jellyfish seem to have their own unique personality — some were fun, some were beautiful and some were just plain silly.

Page 68 of 157
1 66 67 68 69 70 157