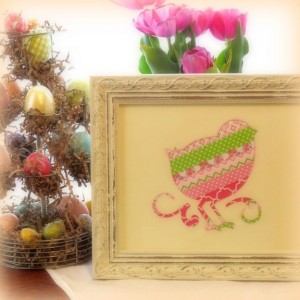
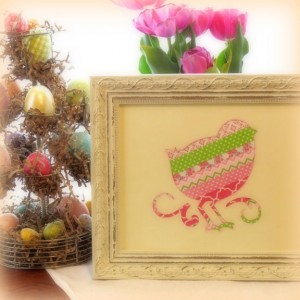
Since my husband won’t buy me an actual peeping chick for Easter (something about coyotes and bobcats eating them or something), I decided to make my very own. I needed to dust off my Cricut machine anyway and I am always looking for a reason to pull out my ever-growing collection of washi tape.

This is a quick little project to create, and as long as you have the supplies on hand it can be really inexpensive to complete. Here’s what you’ll need to hatch your own little chick pic just in time for Easter day.
Materials:
- Cricut machine
- “Celebrate With Flourish“ Cricut cartridge (or suitable substitute)
- Yellow piece of card stock
- White piece of card stock
- Variety of coordinating washi tape
- Coordinating ink pad
- 8×10 photo frame
- paper cutter
Directions:
- Using your Cricut cartridge and machine, cut a six-inch chick out of the center of the yellow cardstock. You actually just want to use the paper with the shape cut out of the middle, so just set aside the chick shape and find some other use for it later.
- Cut down the yellow and the white sheets of cardstock to fit in the 8×10 frame, making sure to keep the chick centered on the yellow piece.
- Ink the edges of the chick shape on the yellow cardstock to help give it definition.
- Adhere several strips of washi tape straight to the white cardstock in an area larger than the centered chick shape. I placed mine at an angle for added interest, but you can do it however you like.
- Place the yellow cardstock on top of the white cardstock and stack them in the picture frame so that you have a colorful little chick pic all your own. Note: If you have any pieces that are not connected to your main image, like the little gap between the chicken legs, you can adhere those straight to your page before you place your artwork in the frame.
Yup, it doesn’t get much easier than that to create an adorable Easter work of art. You can also use other silhouetted images like bunnies, baskets and eggs if you want to experiment with different looks. Happy Easter!
Shared at:
That DIY Party @ DIY Showoff

