Tag: family

Just in Time for St. Patty’s Day Wreath

Just in Time for St. Patty’s Day Wreath

Spring Break is winding down here at the Quarter-Acre Wood and this week has been filled with lots of goings-on that I can’t wait to share with all of you. I’m way behind on my latest events and accomplishments, because my sister, great niece and one of my niece’s friends arrived Sunday to do Spring Break Kansas City style and we have been going ever since.

So first, let me back up to St. Patrick’s Day, yes I know it came and went. . . three days ago, but I so want to show you my new little craft project perfect for the greenest of days. Okay, so I bought the supplies a month ago but I only put it all together the morning of the seventeenth (I told you I was a procrastinator). I was completely determined to make that wreath by St. Patty’s Day, even if it took me until midnight. I’m happy to say it went together quite quickly and we got to enjoy it for several hours. Oh, who am I kidding, it’s still hanging on my door. . . but it’s just so cute. 

St. Patty's Day wreath

Here’s what you’ll need to make your own St. Patty’s Day wreath :

  • 1/4 yard of 5 different green fabrics
  • heavy-gauge wire or coat hanger
  • rotary cutter and cutting mat or scissors (a rotary cutter will make this project a snap)
  • ribbon

This is how you put it all together:

  1. To create the round shape, I used wire that was less stiff than a coat hanger, but still had enough strength to hold it’s shape. I would love to tell you what gauge it happened to be, but that label has long since gone away. Just shape the wire and bend the ends together or, if you’re using a coat hanger, snip off the hanger part and then shape into a circle. I ended up with a circle diameter of 15″, but you can make it a bit larger or smaller as needed.
  2. Using my rotary cutter, I cut 1″ x 6″ strips from each of the five fabrics. You can use scissors or the snip and rip method to cut your strips, but a rotary cutter makes this task so much faster, especially if you fold your fabric a couple of times.
  3. I cut 32 strips from each of the fabrics and used just about everyone one of them on my 15″ diameter wreath. So that was approximately 160 small little pieces of fabric.
  4. To adhere the fabric, simply tie them in a knot all the way around the wreath. I chose a pattern in which to tie them and stuck to it all the way around. Tie a few pieces and then push them together tightly around the wire, then repeat. By continually pushing the tied pieces together, you will get a fuller, fluffier finished product.
  5. After all the fabric strips are tied to your wreath. Cut and tie a long piece of ribbon for the bow.
  6. Lastly pull all the fabric strips ends toward the front of the wreath and fluff them for a finished look.

My sister, the one in town, thought this was a really cute project and made plans to create an Easter or Spring wreath of her own. You really could do one for any holiday just by changing the fabric you choose.

Jell-O Playdough, Recipe for Homemade Fun

Jell-O Playdough, Recipe for Homemade Fun


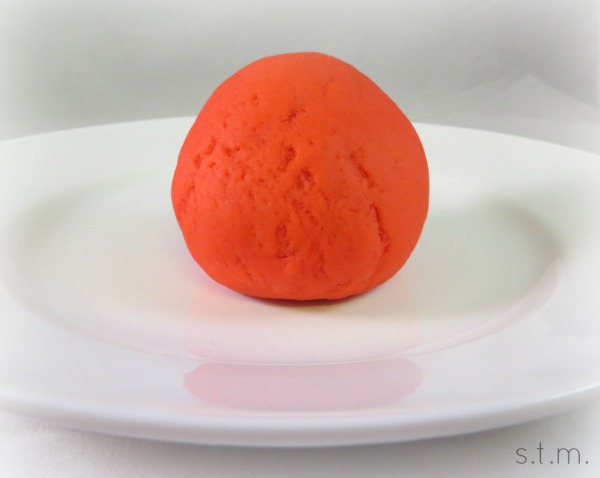
playdough1

We finally tried the Jell-O playing dough thing this weekend, and mom and son gave it two thumbs up. . . oh, and also dad, because he actually gave it the taste test since it smelled so good (not like he snacked on it, just a nibble). We used the recipe from Modern Parents, Messy Kids, but I have seen similar recipes all over the web.

We made raspberry dough because I had it on hand, which made the pinkish red colored dough that you see here. My son enjoyed mixing all the ingredients together, but quickly tired of the stirring and kneading steps; although he magically reappeared for the play/testing phase. The cooking process didn’t take that long, just remember to keep stirring until you really can’t stir any longer. Also, I probably kneaded an additional cup of flour into the dough to get rid of the stickies, so just keep “kneading it in as needed” (ha, get it). When it was finished, I admit I was completely surprised by how much it actually felt like the real thing, and this recipe makes enough for at least a couple of kids to enjoy.

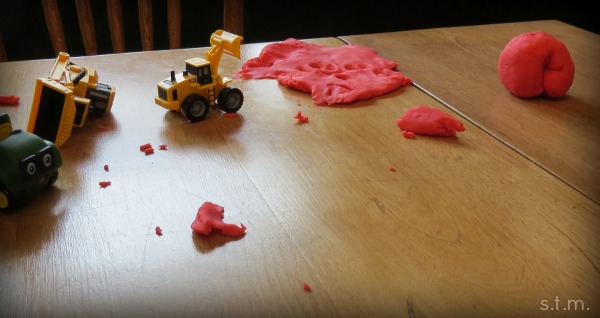
playdough2

Our son played with his newest creation for over an hour Saturday afternoon, and afterwards, we plopped it into an airtight container and put it in the refrigerator until the next play day. According to Modern Parents, Messy Kids, the playing dough should last at least a few weeks if properly stored in the fridge.

So if you have a hankering for some homemade fun, here’s the recipe you should use:

Jell-O Playdough
Homemade playdough that feels like the real thing.
Write a review
Print
Prep Time
10 min
Cook Time
20 min
Total Time
40 min
Prep Time
10 min
Cook Time
20 min
Total Time
40 min
Ingredients
  1. 1 c white flour
  2. 1 c warm water
  3. 2 tbsp. salt
  4. 2 tbsp. cream of tartar
  5. 2 tbsp. cooking oil
  6. 1 Jello pack (3 oz.)
  7. extra flour for kneading
Instructions
  1. Mix all of the ingredients (except extra kneading flour) together in a small saucepan until the lumps are gone.
  2. Cook over medium heat, stirring continuously until it thickens into a big ball of dough. (Stir until you can't stir anymore.)
  3. Turn out the dough on a flour covered surface, cutting board or mat.
  4. Let the dough cool.
  5. Add flour and knead the dough until it is no longer sticky (1/2 cup to 1 cup of flour).
Notes
  1. The dough should stay good for a few weeks if placed in an airtight container and kept in the refrigerator.
Adapted from Modern Parents, Messy Kids
https://www.smalltalkmama.com/
 Shared at:
Green Willow Pond


“Hate” is a Four-Year-Old Letter Word

Every now and then I catch a glimpse of unexpected assurance that our four-year-old son is actually soaking up a few of our better parenting moments. It’s usually when we least expect it and often when he doesn’t know we’re watching, but when it happens it’s gotta make a parent proud.

The other night there was just nothing on TV for the family to watch, so I switched over to Netflix (no, this is not the fine parenting moment of which I speak). I started searching for a family-friendly Disney movie that was not animated, because frankly there are times my husband and I deserve to watch “real” people doing real things during our son’s waking hours. I settled on The Rocketeer, and although I hadn’t seen it in many years I remembered it being a fun wholesome movie. Perhaps I should get my memory checked (showing an unscreened movie to my preschooler — still not my finest parenting moment, but stay with me here).

The first 10 minutes included a rolling gun battle, death, robbery and the D-A-M-N word at least four times. We finally decided to find something else to watch (which probably ended up being Bubble Guppies or Umizoomi after all), but our son was already riveted to the screen. He just couldn’t understand why we nixed the movie, so we told him that the people in it weren’t being very nice and they were saying bad words. Immediately he asked, “What did they say? What did they say?” Of course when we weren’t forthcoming with the actual term, he was left to ponder what he had heard. A few seconds later he came up with the answer.

“Oh, I know what they said. They said ‘hate’ and that’s not nice.”

I smiled and said, “Yes, baby, they said hate.”

Now this may not seem like much to most, but inside I wanted to take a victory lap or do a whole-hearted chest-bump with my equally triumphant husband. Still lost? Well let me interpret:  Thankfully our son hasn’t had enough exposure to the d-word to know it’s connotation and we’ve never heard him say it. On the other hand, he does know and use the h-word. As of late, we have been trying to instill the dislike of hate into his pretty little head, so you just have to understand that it’s a complete proud parent moment when your little one suddenly assumes that “hate” is a four-letter word.

Page 23 of 33
1 21 22 23 24 25 33